Wednesday, 3 September 2014

IKAT Lavander Cushion


A cushion inspired by natures light and shadows in gardens and landscapes. Without holding this cushion for yourself you would never have guessed the aromatic smell of lavender essence that has been partially placed inside the pillow. 

Ikat and double cloth are two techniques which i explored at university and this cushion epitomises the results you can achieve. 

To start with I did not like this sample but when i started to bleach out the intensely dark colours a light shone from the fabric I was creating which inspired me to progress with the idea of light and dark; thin and thick; Opposites attracting.

This fabric is so soft to touch as I used cotton yarns and they cover the wool thick weft yarns in a plain woven effect that was actually set as double cloth but when weaving one on one it creates an inspiring effect of speckled light shining through the darkness.
  

Saturday, 22 February 2014

Weaving Ideas and Next Warp

Things I tried in my test warp were Ikat ideas painting on the warp threads, bleaching colourful yarns out to make them look faded and different pegplan patterns to test what things work or go with what I am trying to achieve.

Bleaching (Above)
 Bleaching and painting ontop of (Above)
Using Ink and water (Above)


Based on my more developed samples which I will post a few of my favourites later. My first warp had too much grey as it was making some of my sample ideas look dirty and not visually appealing. So this time I have decided to go with something a bit more colourful but with some white yarns to make it clean, modern and fresh.


All Images & Designs (Copyright © 2014 Hannah Bramall All Rights Reserved)

Sunday, 9 February 2014

University Project

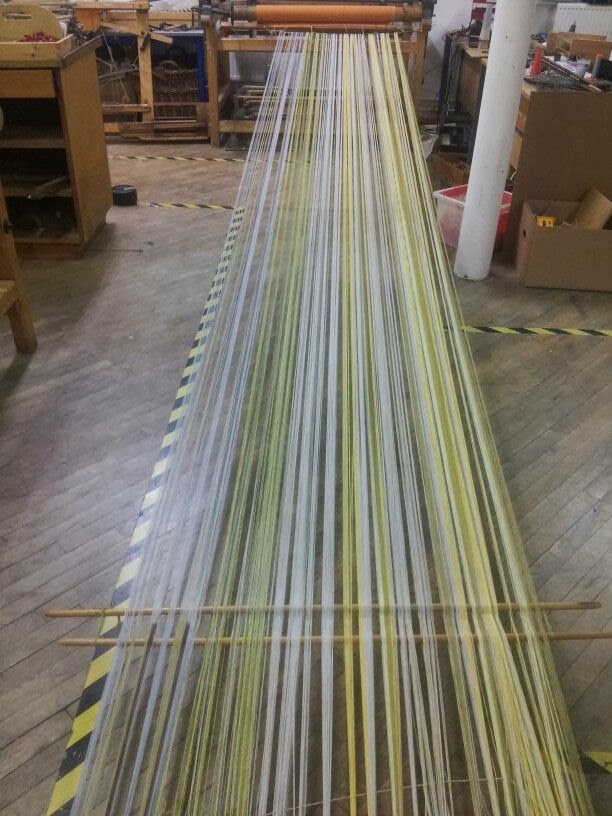
My test warp I have produced for Uni. Inspired by landscapes and gardens. 


Warping up on the Warping Sticks, 3 L's.


Stretching out the Yarns and measuring at the bottom the calculated weaving length and top adding on 2 inches to that figure.


Wrapping it around the beam keeping the tension tight.


 Threading through each yarn so you can make patterns by lifting different sets of threads at different times.


And every weavers joy. Ready to weave!

This stage is the most satisfying because you have worked so hard and now its finally done, you can start producing interesting fabric now.


All Images & Designs (Copyright © 2014 Hannah Bramall All Rights Reserved)

Saturday, 25 January 2014

Facebook Page

If anyone who likes my blog could like my Facebook page that would be great. 

Thanks,

Hannah :)

https://www.facebook.com/HannahsBotanicals

Friday, 24 January 2014

Model Photo-Shoot

This is the first model photo-shoot I have done and edited. All accessory items made are for sale.

(Copyright © 2014 Hannah Bramall All Rights Reserved)

Light and Nature. 

Artistic properties when combined can create intriguing observations. Like taking inspiration from nature and what colours to choose or to use in a particular design. 

The photography helps me express how I see the items I have made been worn. 

Thanks very much to the model Florence (my lovely sister) for helping me achieve some photos of woven products I have made.

Monday, 26 August 2013

First Hand Woven Item on 8 Shaft Loom


This is the first sample I made on my 8 shaft loom. It took me a while at the start to get used to how it works as it is a lot different to what i'm used to using at uni.  I experimented using a few different patterns such as twill, plain weave, wrapping pink raffia around the Ends(threads) and using raffia in the weft. I folded it in half joining it together then turned it inside out and attached a finger knotted piece of lace to add an elegant touch for the handle.

Saturday, 24 August 2013

First Warp for Hand Loom!

I was extremely excited at the start of the summer holidays to receive a hand loom from one of my mums friends which I am very grateful for. 

I started doing calculations for warp ends and deciding what kind of draft I was going to do and how long I was going to make it.

I asked my mum first if I could hammer long nail pegs into the outbuilding door (she thought I was mental but agreed anyway). I created and measured a Warping Frame with 6 pegs on the left side and 5 pegs on the right creating 3 and a half Ls but not in the normal measurement as 1L (correct me if I am wrong?). My 1L measures roughly about half a metre.


After warping 320 Ends (threads from one cone), it was time to take it off (I hate this part with a passion as the fear of tangling all the threads and having to start again is not an exciting thought, I want to get weaving now). I took the threads into the back garden and tied the wooden stick at the back with wool and stretched them, as you can see bellow. Two bricks I found lying at the back of the garden helped stretch the threads whilst I untangled and spread them out. Remembering to measure 2" extra at the top (16") and then measuring the dimension of the fabric at the bottom (14"). 


After sorting and tidying the threads you pick it up and wrap it around the reed you are using. Which is a satisfying feeling (nearly there!). I loved the texture of the wool whilst wrapping it round the reed it felt so soft and cushiony.


The draft I used for threading through the heddles was a block draft; Shafts:1-4 x 20, Shafts: 4-8 x 40, Shafts 1-4 x 20. And then threading through the reed 2 Ends (threads) per dent. Time to weave now, woo!


Pictures of fabric I have made on this loom into purses and other items are coming soon!